I know, I know fractals have been done to death and all that - but I like them so - I'll be playing with fractals a bit too :D
I started with a simple - or at lest what I thought would be simple - 90 degree angle fractal that just scales from big to small....
It was interesting getting the right-angles because of the iteration step, here's that ICE Tree on the rotation stuff.
*click to make bigger*
But all and all I was quite happy with this exercise. It showed me just how little I understand about fractals so obviously after that....
... I went and made a tree...
*click to make bigger*
*click to make bigger*
Yeah, that was fun but still....
what are fractals really anyway? Are there rules? What makes a fractal a fractal and not just some pretty pattern?
Wikipedia says : Fractals are typically self-similar patterns, where self-similar means they are "the same from near as from far". Fractals may be exactly the same at every scale, or, they may be nearly the same at different scales. The definition of fractal goes beyond self-similarity per se to exclude trivial self-similarity and include the idea of a detailed pattern repeating itself.
I for one will be posting loads more on fractals as I play with them :D
For some cool stuff on fractals and doodling click on the triangle below...
Continuing on with the calculating of area... lets look at triangles.
There are tons of ways to get the area of a triangle so.....
Here is a link to wikipedia's section on Triangles .
I went with Heron's Formula, simply because I had all the edge/side lengths worked out already. Here is what my scene looks like...
*click to make bigger*
I drew a linear curve with three points for my triangle.
The black value(area=√( s(s-a)(s-b)(s-c) )) is the area of the triangle, the orange value(cos C = (a^2 + b^2 - c^2)/2ab) is the corner angle of Point_02_Null. The light green value(s = (a+b+c)/2) is half the length of the perimeter of the triangle.
Lets go look at all this in ICE.
To start I made a little cluster to null constraint so I could move the triangle points around freely. I named them Point_01_Null, Point_02_Null and Point_03_Null. *something to keep in mind is that one of your points will be numbered 0, and be on 0,0,0. I just moved mine off the origin. In the wikipedia they go into a whole section on this.*
Here's what that constraint looked like in ICE.
Then I worked out the length and center of the three sides.
Side A, B and C letters where stuck too the curve by a standard Softimage constrain between two points.
Using a linear blend between the two nulls was the fastest why to get the center point on the curves
Using the distance between node, I got all three sides lengths and then added them together to get the perimeter of the whole triangle.
Here's what the inside of the compound "length of C" looks like....
Next I tested the side lengths with the curve length to see if the perimeters matched up.
Now I could work out the angles of the triangle using the law of cosin:
cos C = (a^2 + b^2 - c^2)/2ab
Here's what the ICE tree looks like... *note I had the to use ArcCos to get the right answer*
Last I worked out the Area of my triangle using Herons Formula.
This formula has two parts to it, the first being: (s = (a+b+c)/2 which gets half of the perimeter, and then area=√( s(s-a)(s-b)(s-c) ) which uses the value s to work out the area.
Here's what those two sums look like....
Taking the ready made side lengths(A, B and C) and subtract the value s from them. Multiply those answers with the value s. Thenall thats left is to get the square root of that and you have the area of the triangle.
A Square is a flat shape with 4 equal sides and every angle is a right angle (90°) andopposite sides are parallel.
Diagonals...
A square has two diagonals, they are equal in length and intersect at the middle point.
The Diagonal is the side length(a) times the square root of 2: *side length = a = the length between A and D* (see image at top)
Diagonal "d" = a × √2
Perimeter...
The Perimeter is 4 times the side length:
Perimeter "p" = 4a
Area...
The Area is the side length squared:
Area = a2 = a × a
....or half of thediagonalsquared:
Area = d2/2
What this looks like in ICE ....
Side length
To work out the side length of the square shown below.....
..... Subtract the corner point (-1,-1,0) with corner point (-1,1,0). Then simply get the length of the vector between the them.
Perimeter
The light green perimeter value is worked out with the math sum shown below, while the darker green value shows the curve length attribute in ICE, they are both the same.
p = 4.a
Diagonal
The diagonal length as shown by the blue value below was got by....
d = a . √2
Area
Area can be calculated two ways, by multiplying the side lengths or by the diagonal....
..... here are what those calculations look like in ICE.
Never underestimate the power of reference, here is some I used...
Here is some video reference of a tiger underwater.....
.....I also looked at Ink in water.
After watching the reference many times, I decided to break up the "underwater effect" into five different areas....
Force of movement from the object
Wave motion through hair when the object moves
Water movement and direction
Other objects making the water move for example the paw of the tiger
Over all Puff
Demo Scene
In my little demo scene for this blog post I'm going to touch on some of the ways I got around these problems. Obviously it includes tons of things I learned from tutorials and other resources. I'm not going to go into to much detail. Honestly I don't know if this is the best way to make under water fur effects, lets just say it worked for me :D Here's a Capture of the demo scene....
Break down of Scene
There is an over all modulate by null in this scene - Box null - , so that it looks like the sphere is entering the water, and leaving it again. Also all the effects are in the modeling stack in ICE. None of the effects are in the "Simulation stack".
Step One: "Force of movement" made with the following ICE Trees
Create an none simulated ICE tree in the modeling stack. Then get the point velocity from the emitter using the get closest location node, then apply that point velocity value to all the points in the strand. This way we get a strand velocity value for each point on the strand.
Then I apply the Velocity as a "force", and vary it with the mass of the strands.
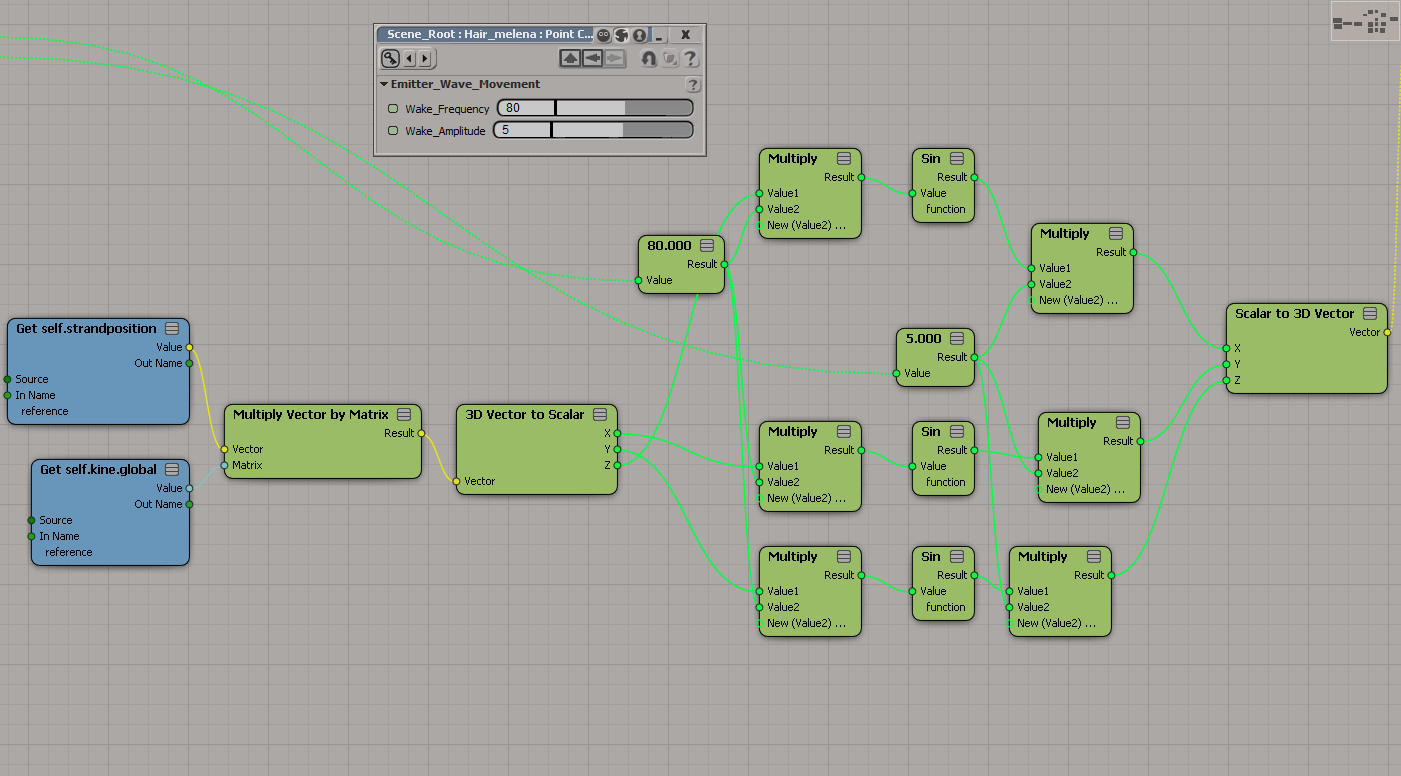
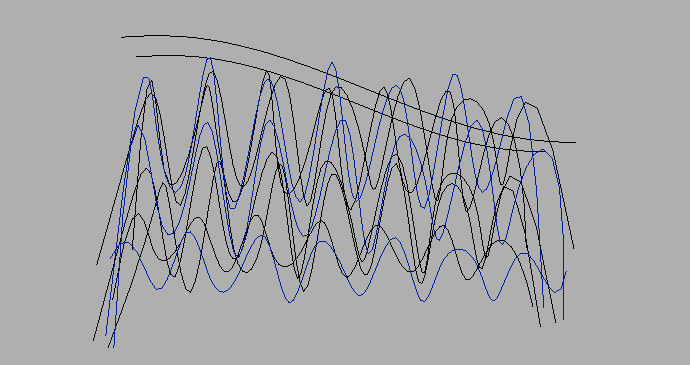
Step two: I made the following ICE trees for the wake.
The wake was just added to the "force" of the velocity.
The wake is a simple sin function that takes the global position into account. I added a random around value to the amplitude to get it to be less repetitive.
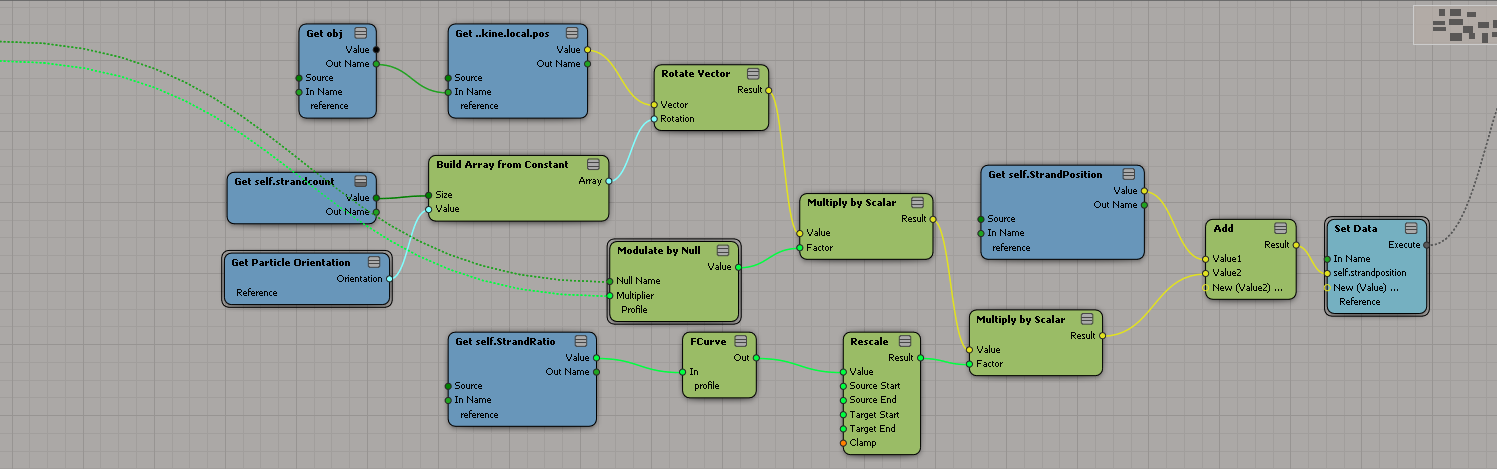
Step three: The following ICE Trees are for water direction and movement.
To start off, watch this tutorial by Paul Smith Vector Flow
So now that you have a feel for vector flow, I used the vector flow of a bunch of curves the represented the "waters" flow direction. This is all still in the modeling stack.
Here are the curves I made for this scene.... to create variation of motion in the water I just animated the curves to rotate around their local orientation.
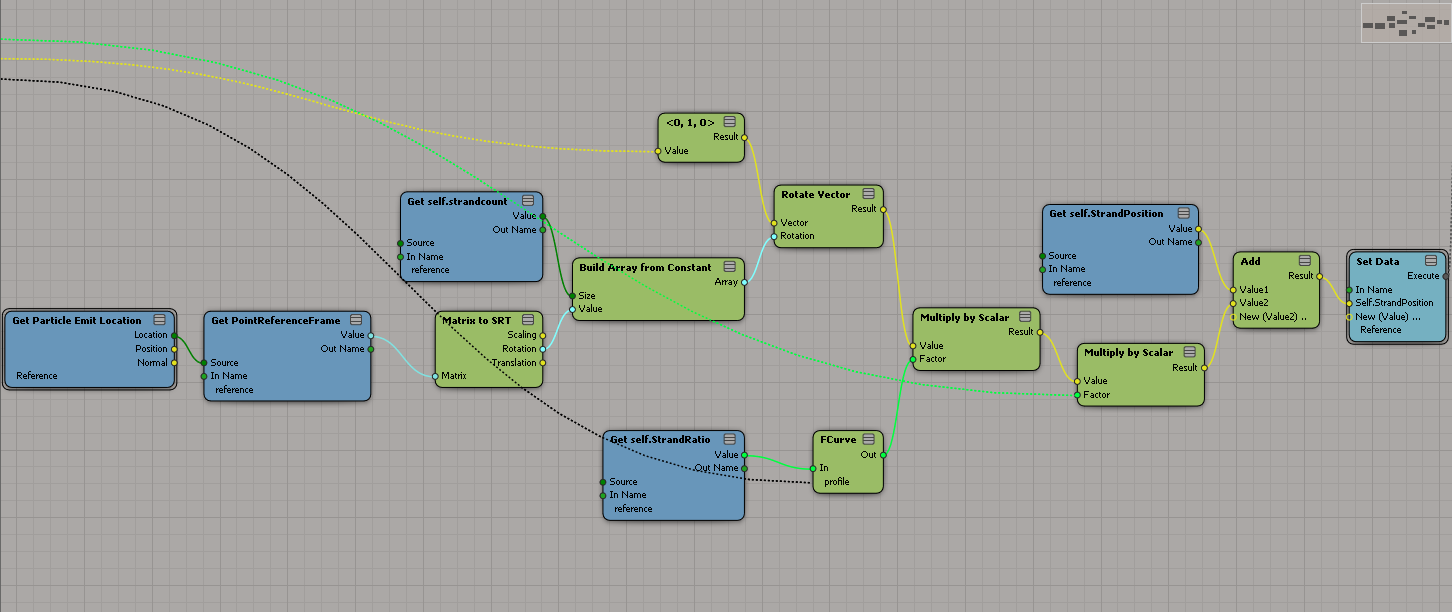
Step Four: Other objects making the water move
Here I have the strands push away from a Null object. I modified the modulate by null to take into account the strand position of the strands.
Step Five: Puff
The puff is just a simple push along the Y axis of the strands to add the illusion of weightlessness.
Nice thing about doing the "under water effect" in the modelling stack is... I could step through my scene without having to wait for a simulation bar to calculate. And because of the curves I could change the way the water effected the fur on frame 60 but have frame 5 be uneffected. Which is really nice and flexible and feels more like animating then simulating. :D