Backface Culling
In computer graphics backface culling determines whether something is "visible" in the camera's field of view. This process makes rendering fur a lot quicker as you only render the fur that is "seen" instead of rendering the fur that is hidden from the camera.
Image U is what the Camera sees.....
Image U
*click on image to make it bigger*
If there was no backface culling there would be a lot of fur in the scene to calculate. Like in the Image F....
Image F
*click on image to make it bigger* But if you use ICE to create backface culling you can reduce the amount of fur that the renderer needs to calculate by quite a lot, as you can see from Image Y...
Image Y
*click on image to make it bigger*
So how do we do Backface Culling and Clipping in ICE?
The most common way of calculating "backface culling", would be to use a "dot product" to determine the normals of the mesh the fur is grown from then delete the fur that is not "seen" by the camera.
As you can see from the image below named "Clipping" we can see that Clipping deletes the fur that is outside the F.O.V of the camera, shown by the blue lines. For the actual "Culling" I used a similar approach to the dot product, but ignore the edge of the cameras F.O.V. Instead we focus on the side of the object that faces away from the camera, illustrated by the red line in the image called "Culling".
"Clipping"
*click on image to make it bigger*
"Culling"
*click on image to make it bigger*
When you combine the two you get Image Y, shown earlier.
Lets take a look at ICE and see how this all gets done. Here in Image Q is the node we used on Khumba to Cull the fur.When you combine the two you get Image Y, shown earlier.
Image Q
*click on image to make it bigger*
The Red Square is a scalar that makes it possible for us to adjust the Culling after we added the original values from the camera, just like a fall off.
The Blue Square is exactly the same except it gives us a fall off for the Clipping.
So within ICE
we can adjust the Field Of View(F.O.V) as we need it. Without having
to touch the camera settings/setup's. The Blue lines in Images H,J and I represent the
actual camera F.O.V, while the Red lines shows how ICE adjusts the F.O.V.
*click on image to make it bigger*
Image J
*click on image to make it bigger*
Image I

*click on image to make it bigger*
Image A
*click on image to make it bigger*
Image B deals with the clipping of the fur. Here we use a standard node in ICE called "Test Visibility From Camera", we have modified it a bit to work for our needs. We obviously don't just want to test visibility from the camera when it comes to culling fur. It works out the length of the four sides of the camera view (inside the Red square) -- making a square in space -- using a dot product sum between the fur (inside the Blue square) and the camera (inside the Green square), then we just say delete everything outside of that square (inside the Yellow square). To do this we need the cameras position in space (inside the Green square) and the F.O.V and aspect ratio of the camera (inside the Purple square).
Image B
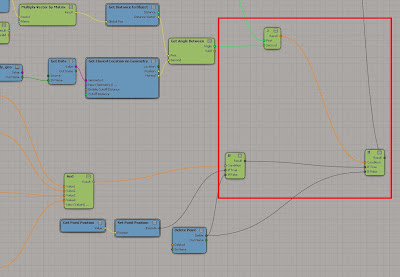
Image C brings the Culling and the Clipping together with an IF statement. If there is fur inside the clipping square that is behind the character then that fur will also get deleted.
Image C
*click on image to make it bigger*
And that is culling fur in a nut shell. There are tons of Clipping Algorithms
that you can go look at here
:D


No comments:
Post a Comment