Pages

Showing posts with label Strands. Show all posts

Thursday, November 15, 2012

Underwater fur . . .


First step find reference of animals underwater


Never underestimate the power of reference, here is some I used...

UnderWater Fur
Fur Under the water

Here is some video reference of a tiger underwater.....


.....I also looked at Ink in water.


After watching the reference many times, I decided to break up the "underwater effect" into five different areas....

  1. Force of movement from the object
  2. Wave motion through hair when the object moves
  3.  Water movement and direction
  4.  Other objects making the water move for example the paw of the tiger
  5.  Over all Puff

    Demo Scene

    In my little demo scene for this blog post I'm going to touch on some of the ways I got around these problems. Obviously it includes tons of things I learned from tutorials and other resources. I'm not going to go into to much detail. Honestly I don't know if this is the best way to make under water fur effects, lets just say it worked for me :D Here's a Capture of the demo scene....


    Break down of Scene


    There is an over all modulate by null in this scene - Box null - , so that it looks like the sphere is entering the water, and leaving it again. Also all the effects are in the modeling stack in ICE. None of the effects are in the "Simulation stack".


    Step One: "Force of movement" made with the following ICE Trees

    Create an none simulated ICE tree in the modeling stack. Then get the point velocity from the emitter using the get closest location node, then apply that point velocity value to all the points in the strand. This way we get a strand velocity value for each point on the strand.


    Then I apply the Velocity as a "force", and vary it with the mass of the strands.


    Step two: I made the following ICE trees for the wake.


     The wake was just added to the "force" of the velocity.


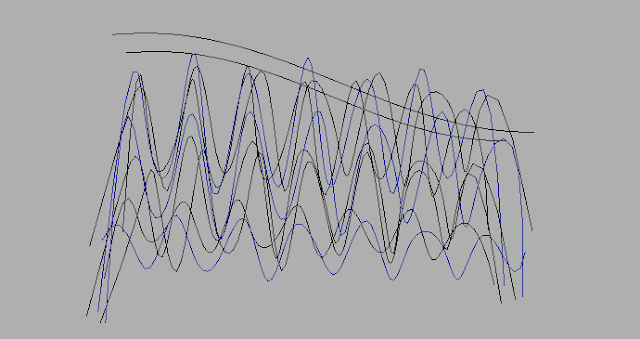
    The wake is a simple sin function that takes the global position into account. I added a random around value to the amplitude to get it to be less repetitive.


    Step three: The following ICE Trees are for water direction and movement.


    To start off, watch this tutorial by Paul Smith
    Vector Flow

    So now that you have a feel for vector flow, I used the vector flow of a bunch of curves the represented the "waters" flow direction. This is all still in the modeling stack.


    Here are the curves I made for this scene.... to create variation of motion in the water I just animated the curves to rotate around their local orientation.


    Step Four: Other objects making the water move

    Here I have the strands push away from a Null object. I modified the modulate by null to take into account the strand position of the strands.


    Step Five: Puff


    The puff is just a simple push along the Y axis of the strands to add the illusion of weightlessness.


    Nice thing about doing the "under water effect" in the modelling stack is... I could step through my scene without having to wait for a simulation bar to calculate. And because of the curves I could change the way the water effected the fur on frame 60 but have frame 5 be uneffected. Which is really nice and flexible and feels more like animating then simulating. :D

    Thursday, September 13, 2012

    Backface Culling/Clipping of ICE Strands


    Backface Culling


    In computer graphics backface culling determines whether something is "visible" in the camera's field of view. This process makes rendering fur a lot quicker as you only render the fur that is "seen" instead of rendering the fur that is hidden from the camera.

    Image U is what the Camera sees.....

    Image U
    *click on image to make it bigger*
      If there was no backface culling there would be a lot of fur in the scene to calculate. Like in the Image F....
      Image F
     
    *click on image to make it bigger* 

    But if you use ICE to create backface culling you can reduce the amount of fur that the renderer needs to calculate by quite a lot, as you can see from Image Y...

    Image Y
    *click on image to make it bigger* 


    So how do we do Backface Culling and Clipping in ICE?


    The most common way of calculating "backface culling", would be to use a "dot product" to determine the normals of the mesh the fur is grown from then delete the fur that is not "seen" by the camera.
    As you can see from the image below named "Clipping" we can see that Clipping deletes the fur that is outside the F.O.V of the camera, shown by the blue lines.  For the actual "Culling" I used a similar approach to the dot product, but ignore the edge of the cameras F.O.V. Instead we focus on the side of the object that faces away from the camera, illustrated by the red line in the image called "Culling".


    "Clipping"
    *click on image to make it bigger*  
    "Culling"
    *click on image to make it bigger*   

    When you combine the two you get Image Y, shown earlier.
    Lets take a look at ICE and see how this all gets done.  Here in Image Q is the node we used on Khumba to Cull the fur.

    Image Q
    *click on image to make it bigger* 

    The Red Square is a scalar that makes it possible for us to adjust the Culling after we added the original values from the camera, just like a fall off.
    The Blue Square is exactly the same except it gives us a fall off for the Clipping.
    So within ICE we can adjust the Field Of View(F.O.V) as we need it. Without having to touch the camera settings/setup's. The Blue lines in Images H,J and I represent the actual camera F.O.V, while the Red lines shows how ICE adjusts the F.O.V.

    Image H
      
    *click on image to make it bigger*  

    Image J
     
    *click on image to make it bigger*  
     Image I
     
    *click on image to make it bigger*  

     
    When we explore inside, the node is made up of three sections, Image A and Image B and then brought together with Image C

    Image A
    *click on image to make it bigger*  

    Image A has to do with the Culling. We get the angle between the emitter object and the camera (inside the Blue square), then we get the angle of the Field of View of the camera (inside the Red square),  using the greater than or equal to Boolean node (inside the Orange square) we say that anything outside that angle gets deleted. So imagine a Triangle, everything inside the triangle stays, everything outside goes (deleted).

    Image B deals with the clipping of the fur. Here we use a standard node in ICE called "Test Visibility From Camera", we have modified it a bit to work for our needs. We obviously don't just want to test visibility from the camera when it comes to culling fur. It works out the length of the four sides of the camera view (inside the Red square) -- making a square in space -- using a dot product sum between the fur (inside the Blue square) and the camera (inside the Green square), then we just say delete everything outside of that square (inside the Yellow square). To do this we need the cameras position in space (inside the Green square) and the F.O.V and aspect ratio of the camera (inside the Purple square).


    Image B
     *click on image to make it bigger* 

    Image C brings the Culling and the Clipping together with an IF statement. If there is fur inside the clipping square that is behind the character then that fur will also get deleted.


     Image C
     *click on image to make it bigger*


    This is what it all looks like over time with a moving camera.


    And that is culling fur in a nut shell. There are tons of Clipping Algorithms
    that you can go look at here

    :D


    Thursday, June 14, 2012

    Making a turbulence fall off along a strand


    Got a Comment from Chris on fall offs for turbulence, Sorry for the late replay been hectic at work(and diablo :D)

    But anyway, straight to it then.

    Bring into your Ice Tree the TF_Frizz_Strands_by_Turbulence node, it looks like this:

    Strand Turbulence ICE/SoftIMAGE
    *click to make bigger*


    Now to add the fall off you will have to go inside the compound and add the following nodes:


    Fall off along Strand
    *click to make bigger*

    Basically what you are doing is multiplying the turbulence with the fcurve, where its value is zero there will be no turbulence, where the value is 1(1.5) there will be turbulence.


    Rescale with a curve Fall off along a strand ICE/SOFTIMAGE
    *click to make bigger*


    So before the fall off it looked like-----

    Strands in ice with Turbulence
    *click to make bigger*


    And after ------

    Ice Strands With Turbulence that Falls off along the strand
    *click to make bigger*


    Hope that helps with your project Chris :D

    Tuesday, May 15, 2012

    Fur Nodes using Melena Base for Khumba


    Alo again :D

    Here are the Compounds I made and used to create the fur,feathers and Scales for Khumba the Movie.
    P.S. It needs melena as a base. Hopefully when I'm done with the whole system it wont need that any more as I found that the curve sets it creates are super heavy. Any way here is the link......

    https://docs.google.com/file/d/0B8MfxqvWZh32dXd5ZnV5ZFpEWnM/edit

    Just a note, I'm still a noob at Ice in general sooooo, just saying :D

    Enjoy

    Friday, May 11, 2012

    How To Link a Texture Map to Strands(XSI Ice)


    Alo there Blog,

    So I've been asked to explain how to link a Texture Map to an ICE Tree in Softimage\XSI.

    This is really easy once you get your head around it, and hopefully this little step by step tutorial will help you guy's to do that. :D

    1.  First step is to have an object (Sphere in this tutorial)
    On said object create a Texture Map as follows
    P.S you can use any Texture Map you like, then link your uv's to it.

    *click on image to make it bigger*


    2. Now we can go to our ICE Tree, and connect our Texture Map. For this you will need the get closest location node, and a get data(for your Texture Map).

    ICE/SoftImage Link Texture Map
    *click on image to make it bigger*

     
    3. The last step, connecting the color attribute from the Ice Tree to our render Tree.


    ICE/SOFTIMAGE linking render tree to ice tree
    *click on image to make it bigger*

    And there you have it. One Texture Map connected to one ICE Tree with the Render Tree.

    Hope this was helpful
    Thanks :D